How to Set Up SSO with Auth0
This article aims to provide a detailed guide on configuring and testing "Single Sign On" authentication using Auth0 as an identity provider.
Single Sign-On (SSO) is the implementation of a centralized authentication system where users can log in and gain access to multiple applications or services without the need to log in again for each one. Auth0 is a popular Identity as a Service (IDaaS) provider that offers a platform for implementing authentication and authorization functionalities in applications, in this case, the Magentrix portal.
This article provides an overview of the fundamental steps involved in setting up Single Sign-On (SSO). It's important to note that while this guide covers the basics of SSO setup, there may be additional optional configuration steps that are not included here.
Setting Up Auth0
Auth0 requires you to create an account on their website to use the service.
Auth0 portal link: https://auth0.com

The first step will be to create a user that will be used later to test the login.
Navigate to User Management > Users.

The user's email address should be added, along with a password.
Note: Please ensure that the email address that is being created on the Auth0 portal matches with the username on the Magentrix portal.

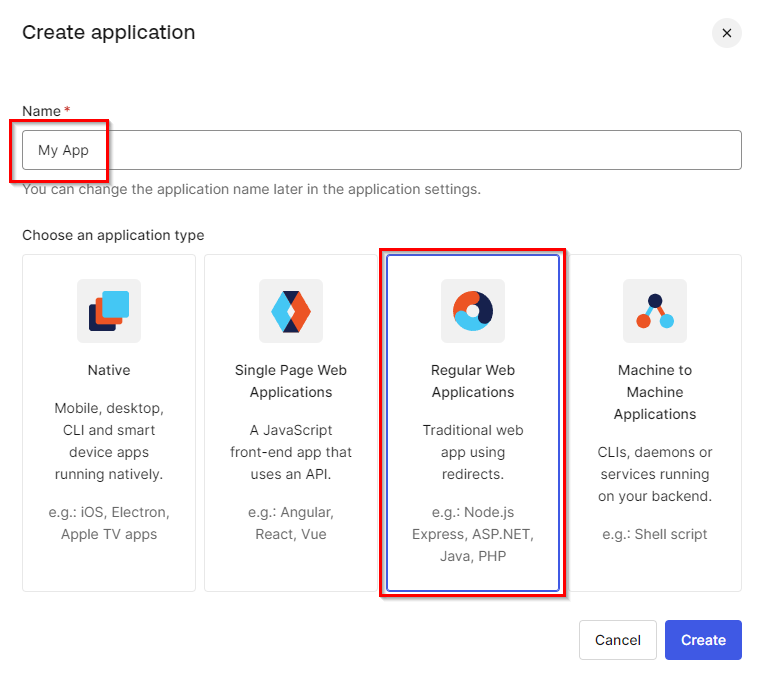
The next step is to create a new "Application".
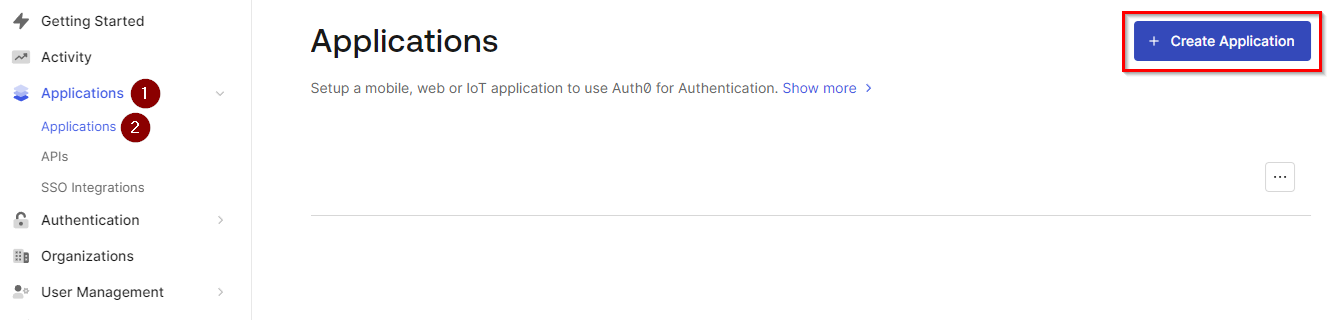
Fill in the name of this Application and select the "Regular Web Applications" option as "Application type".
Now, enable SAML 2.0, which stands for Security Assertion Markup Language 2.0. It is an XML-based open standard for exchanging authentication and authorization data between parties, particularly between identity providers and service providers. Magentrix's SSO feature is based on this.
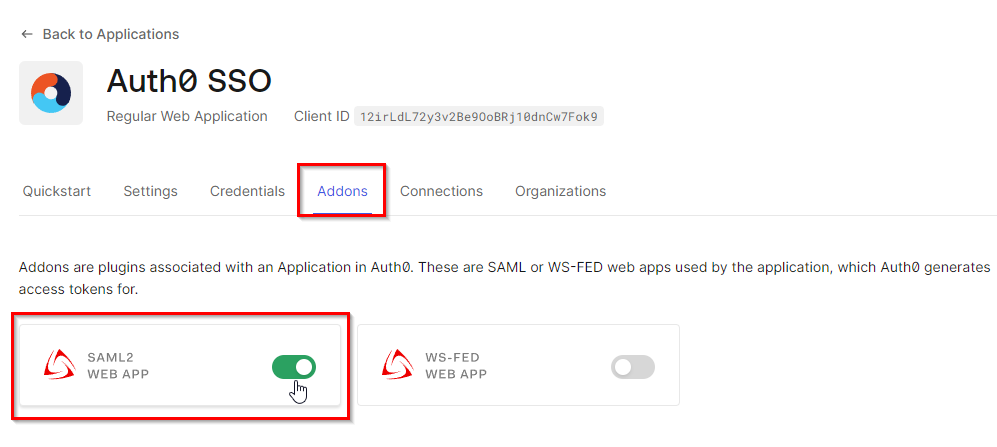
When activated, a new page will open. This page provides the address of the "Identity Provider Login URL" and the Certificate file. Copy the URL for the "Identity Provider Login URL", download the "Identity Provider Certificate", and proceed to the Magentrix portal.

Magentrix Portal Settings
The first step in configuring the Magentrix portal would be to ensure that SAML is enabled. For this, navigate to Manage > Company Preferences, click "Edit", select the "Security Settings" tab, check SAML Enabled and "Save".

After activating SAML, navigate to Security > Single Sign On and create a new record by clicking "New"
Configure the following fields:
Name: Enter the name of the SAML Provider.
Issuer: Automatically populated from the Name field.
Description: Enter an optional description for the SAML Setting.
Single Sign-On Service URL: Paste the URL address copied from within the Auth0 portal.
Identity Provider Certificate: Upload the certificate downloaded under Auth0. The file format must be .cer
SAML Identity Type: Assertion contains the User’s Magentrix username.
Identity Provider Login URL: This field allows you to specify the login URL of the Identity Provider. The field is optional.
Identity Provider Logout URL: When a user logs out of the portal, this field redirects them to a specific URL. The field is optional.
Custom Error URL: Use this field to redirect users to a custom error page when there is a login error. The field is optional.
Service Provider Initiated Request Binding: HTTP Post
Login Button: Check this option to show a Login button on the Login Page.
Associate with a Custom Hub: Choose the Custom Hub from the dropdown list to redirect users to one. Optional field.
Once the settings have been saved, copy the URL displayed at the bottom of the page under "Service Provider Details". This information is only generated after saving the previous settings.

Auth0 Portal Final Settings
With the ACS URL address copied, go back to the Auth0 portal and click on the "Settings" tab on the same SAML 2.0 settings page. Paste the copied address into "Application Callback URL" and press enter to save.

On the "Settings" page, it is possible to see several SAML protocol parameters. These parameters are not active by default as the double slash (//) on each line deactivates the line.
The list of the meaning of each parameter can be found by scrolling down on the same page.
The main parameters that will make the service work and be ready to test are posted below:
{
  "nameIdentifierProbes": [
    "http://schemas.xmlsoap.org/ws/2005/05/identity/claims/emailaddress"
  ]
}
This parameter can be copied from this article and pasted into the Auth0 settings. It will look like this:

Now navigate to the bottom of the page and click "Save".
A message will be prompted:
Successfully saved your changes. Changes may take up to 30 seconds before they take effect.
SSO Authentication Test
Using an incognito browser window, access the portal's address and select the new SSO login option that is displayed below the Login credentials.


Type the credentials for the Auth0 user that was created previously under the "Setting Up Auth0" topic and the Magentrix portal will open.